
The Art of Integrating a Valve and Shower Kit in Modern Bathrooms
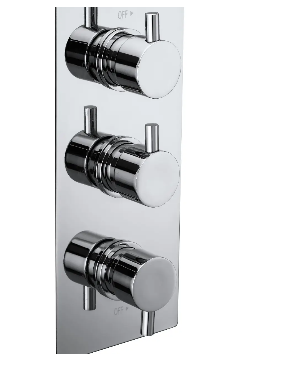
A well-designed valve and shower kit can dramatically enhance both the functionality and aesthetics of a bathroom. Modern bathrooms demand solutions that combine precision, efficiency, and style, and selecting the right valve and shower kit is central to achieving this balance. A high-quality valve and shower kit allows precise control over water flow and temperature while providing versatile options for different shower configurations. Designers often emphasize the importance of matching finishes and materials of the valve and shower kit to the overall bathroom theme, ensuring a cohesive and luxurious look.
Installing a valve and shower kit not only improves user experience but also contributes to water efficiency and safety. Advanced kits often incorporate thermostatic valves that maintain a consistent water temperature, reducing the risk of scalding. Additionally, the choice of shower heads, hand showers, and body jets included in a valve and shower kit allows homeowners to create customized shower experiences. With proper selection and installation, a valve and shower kit becomes both a functional centerpiece and a design statement in any modern bathroom.
Choosing the Right Valve and Shower Kit
Understanding Different Valve Types
Valve and shower kits come with various valve types, including manual, thermostatic, and pressure-balance valves. Each type offers unique advantages in controlling water temperature and flow. Understanding these options helps homeowners and designers select the best valve and shower kit for specific needs.
Evaluating Shower Kit Components
Shower kits often include a combination of shower heads, hand showers, and diverters. Evaluating the components ensures that the valve and shower kit delivers the desired performance and complements the overall bathroom design. Choosing a kit with durable and high-quality parts ensures long-lasting reliability.
Preparing for Installation
Gathering Tools and Materials
Before installing a valve and shower kit, gather essential tools such as pipe wrenches, plumber’s tape, screwdrivers, and a level. Having all materials on hand, including fittings and mounting hardware, makes installation efficient and reduces the risk of errors.
Shutting Off Water Supply
Always turn off the main water supply before starting installation. Confirm that the water has stopped by testing existing fixtures. Proper preparation prevents leaks and water damage during the installation of a valve and shower kit.
Installing a Valve and Shower Kit
Positioning the Valve
Place the valve in the designated location within the wall cavity or mounting area. Ensure it is level and properly aligned with water inlets and outlets. Correct positioning is crucial for optimal performance and integration with the shower kit.
Connecting Pipes and Fittings
Connect the hot and cold water supply lines to the valve using the appropriate fittings. Use plumber’s tape to secure threaded connections and prevent leaks. Ensuring all pipes are properly connected maintains the efficiency and safety of the valve and shower kit.
Mounting Shower Components
Attach the shower head, hand shower, and any additional components included in the kit. Ensure each element is securely fastened and positioned for convenient use. Proper mounting contributes to both functionality and aesthetic appeal.
Testing the Valve and Shower Kit
Checking for Leaks
Once installed, turn on the water supply and observe all connections. Check for any signs of leaks around the valve, pipes, and shower components. Address minor leaks immediately to prevent long-term issues and maintain the integrity of the valve and shower kit.
Ensuring Temperature and Flow Control
Test the valve and shower kit to ensure smooth control over water temperature and flow. Thermostatic valves should maintain a consistent temperature, and diverters should switch seamlessly between shower components. Proper testing guarantees a comfortable and safe shower experience.
Maintaining Your Valve and Shower Kit
Regular Cleaning and Care
Clean the valve and shower kit components regularly to prevent limescale buildup and maintain their finish. Use non-abrasive cleaning solutions and soft cloths to avoid scratching surfaces. Proper care preserves both appearance and functionality.
Periodic Inspection
Inspect the valve and shower kit periodically to check for leaks, worn washers, or loose fittings. Addressing small issues promptly extends the life of the kit and ensures continued reliable performance.
Enhancing Bathroom Experience with Valve and Shower Kits
Multi-Function Shower Heads
Many valve and shower kits offer multi-function shower heads that provide various spray patterns. These features allow users to customize their shower experience, enhancing comfort and enjoyment in daily routines.
Thermostatic and Pressure-Balance Valves
Thermostatic and pressure-balance valves in a valve and shower kit provide precise temperature control and prevent sudden fluctuations. These features improve safety and contribute to a more consistent and enjoyable shower.
Safety Tips for Installing Valve and Shower Kits
Avoiding Common Installation Mistakes
Common mistakes during installation include misaligned valves, overtightened fittings, and improper sealing. Avoiding these errors ensures the valve and shower kit operates efficiently and safely.
Using Proper Tools and Techniques
Use the recommended tools and follow installation guidelines closely. Proper handling of pipes, fittings, and the valve ensures a secure and long-lasting installation.
FAQ
How do I choose the right valve and shower kit for my bathroom?
Consider water pressure, preferred shower configuration, valve type, and design style when selecting a valve and shower kit. Ensure the kit matches your functional and aesthetic needs.
Can I install a valve and shower kit myself?
Many valve and shower kits can be installed by homeowners with plumbing knowledge. Complex kits, particularly those with thermostatic valves, may require professional installation to ensure safety and optimal performance.
How do I maintain my valve and shower kit to last longer?
Regular cleaning of the shower head, hand shower, and valve components prevents limescale buildup. Inspect connections and washers periodically to ensure smooth operation and prevent leaks.
What are the benefits of a thermostatic valve in a shower kit?
Thermostatic valves provide consistent water temperature, enhance safety by preventing scalding, and allow precise control of water flow. They improve overall shower comfort and efficiency.
Table of Contents
- The Art of Integrating a Valve and Shower Kit in Modern Bathrooms
- Choosing the Right Valve and Shower Kit
- Preparing for Installation
- Installing a Valve and Shower Kit
- Testing the Valve and Shower Kit
- Maintaining Your Valve and Shower Kit
- Enhancing Bathroom Experience with Valve and Shower Kits
- Safety Tips for Installing Valve and Shower Kits
- FAQ