
Основные советы по установке вашего Кухонный кран
Установка нового кухонный кран может изменить функциональность и внешний вид вашей кухни. Многие домовладельцы рассматривают возможность обновления кухонного смесителя, чтобы улучшить напор воды, повысить долговечность и придать современный вид. Выбор подходящего кухонного смесителя включает учет таких факторов, как стиль, покрытие и эффективность расхода воды. Современные кухонные смесители представлены в различных моделях, включая однорычажные, двухвентильные, выдвижные и смесители с сенсорным управлением. Перед началом установки важно понимать основные компоненты и необходимые инструменты, чтобы обеспечить бесперебойный процесс и долговечный результат.
Качественный кухонный смеситель не только обеспечивает надежную подачу воды, но и придает вашей кухне изысканность. Процесс установки на первый взгляд может показаться сложным, но при правильной подготовке вы сможете добиться профессионального результата. Заменяете ли вы старый кухонный смеситель или устанавливаете новый для новой мойки, соблюдение правильных шагов гарантирует безопасность, эффективность и долгий срок службы. Понимание устройства вашего кухонного смесителя также поможет в будущем с техническим обслуживанием и устранением неполадок.
Подготовка к установке кухонного смесителя
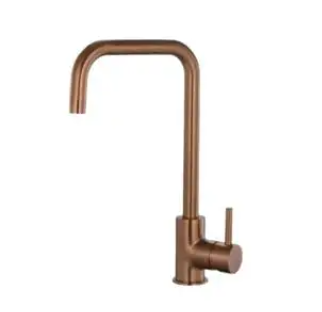
Выбор подходящего кухонного смесителя
Выбор подходящего кухонного смесителя имеет важное значение для соответствия конфигурации мойки и стилю кухни. При выборе кухонного смесителя следует учитывать высоту, досягаемость и функциональность излива. Например, смеситель с высокой дугой излива может обеспечить больше места для мытья крупных кастрюль, а выдвижной смеситель предлагает гибкость и удобство.
Сбор необходимых инструментов и материалов
Перед началом установки убедитесь, что у вас есть все необходимые инструменты, такие как гаечный ключ, сантехническая лента, ведро и отвёртка. Наличие нужных материалов, включая шайбы, гайки и крепёжные детали, делает процесс установки кухонного смесителя более простым и снижает риск протечек.
Снятие старого кухонного смесителя
Отключение подачи воды
Первым шагом при замене кухонного смесителя является отключение подачи воды, чтобы предотвратить протечки и затопление. Найдите запорные вентили под раковиной и поверните их по часовой стрелке до полного закрытия. Всегда проверяйте, включив текущий кухонный смеситель, чтобы убедиться в отсутствии потока воды.
Отсоединение подводок подачи воды
После отключения воды отсоедините подводки от старого кухонного смесителя. Используйте разводной ключ, чтобы аккуратно ослабить соединения, и поставьте ведро снизу, чтобы собрать остаточную воду. Этот шаг обеспечивает чистоту и безопасность при установке нового кухонного смесителя.
Установка нового кухонного смесителя
Установка кухонного смесителя
Установите новый кухонный смеситель в монтажные отверстия мойки или столешницы. Убедитесь, что смеситель правильно выровнен относительно мойки и что его основание плотно прилегает к поверхности. Правильная установка обеспечивает как функциональность, так и эстетическую привлекательность.
Фиксация кухонного смесителя
Закрепите кухонный кран под раковиной, чтобы закрепить его. Аккуратно затяните гайки, избегая чрезмерного затягивания, которое может повредить кран или раковину. Надёжное крепление предотвращает шатание и сохраняет целостность кухонного крана в течение долгого времени.
Подключение линий водоснабжения
Подключите линии подачи горячей и холодной воды к соответствующим входам кухонного смесителя. Используйте уплотнительную ленту для резьбовых соединений, чтобы обеспечить герметичность. После подключения медленно включите подачу воды и проверьте наличие утечек.
Проверка работы кухонного смесителя
Проверка на наличие утечек
После установки включите кухонный смеситель и проверьте соединения на предмет признаков утечки. Устраняйте незначительные утечки путем подтягивания соединений или регулировки прокладок. Регулярный осмотр кухонного смесителя после установки помогает предотвратить длительное повреждение от воды.
Проверка работоспособности
Проверьте все функции кухонного смесителя, включая распыление, поворотный излив и регулировку температуры. Убедитесь, что вода течет плавно, а смеситель работает без посторонних шумов или сопротивления. Полностью функциональный кухонный смеситель улучшает использование кухни и обеспечивает надежную работу.
Уход за кухонным смесителем
Советы по уборке и уходу
Регулярная очистка кухонного смесителя предотвращает образование накипи и сохраняет его внешний вид. Используйте мягкие моющие средства и мягкую ткань для очистки поверхности, избегая абразивных материалов, которые могут поцарапать покрытие.
Периодическая проверка
Периодически проверяйте кухонный смеситель на наличие признаков износа или протечек. Проверяйте прокладки, шланги и соединения, чтобы обеспечить оптимальную работу. Правильное обслуживание продлевает срок службы кухонного смесителя и снижает необходимость дорогостоящего ремонта.
Установка кухонного смесителя для различных типов раковин
Установка на раковину с одной чашей
При установке кухонного смесителя на раковину с одной чашей может потребоваться короткий излив или особая конфигурация крепления. Убедитесь, что смеситель обеспечивает достаточный зазор для мытья крупных предметов.
Установка на раковину с двумя чашами
Для раковин с двумя чашами выберите кухонный смеситель, который может поворачиваться или выдвигаться, чтобы эффективно доставать до обеих чаш. Правильное размещение смесителя повышает удобство и функциональность в повседневных задачах.
Повышение функциональности кухни с помощью функций кухонного смесителя
Выдвижные и вытягивающиеся кухонные смесители
Выдвижные и вытягивающиеся кухонные смесители обеспечивают гибкость и удобство при мытье и наполнении емкостей. Эти смесители особенно полезны на загруженных кухнях или для больших раковин.
Сенсорные кухонные смесители
Сенсорные кухонные смесители обеспечивают бесконтактное использование, улучшая гигиену и экономя воду. Установка такого смесителя требует внимания к выравниванию сенсора и источнику питания, однако преимущества значительны.
Советы по безопасности при установке кухонного смесителя
Избегание распространенных ошибок при установке
Типичные ошибки при установке кухонного смесителя включают чрезмерное затягивание, неправильное выравнивание и игнорирование запорных вентилей подачи воды. Осведомлённость об этих проблемах обеспечивает более лёгкую установку и предотвращает будущие неполадки.
Использование правильных инструментов и методов
Всегда используйте соответствующие инструменты для установки и соблюдайте рекомендованные методы затяжки, герметизации и монтажа кухонного смесителя. Правильное обращение сводит к минимуму риск повреждения и обеспечивает надёжную фиксацию.
Часто задаваемые вопросы
Каков наилучший способ предотвратить протечки после установки кухонного смесителя?
Чтобы предотвратить утечки, убедитесь, что все соединения надежно затянуты и загерметизированы с помощью фум-ленты при необходимости. Проверьте кухонный смеситель после первого использования, чтобы убедиться в отсутствии протечек воды из соединений.
Как часто следует чистить и обслуживать мой кухонный смеситель?
Рекомендуется еженедельно чистить кухонный смеситель с использованием мягкого моющего средства и мягкой ткани. Периодически проверяйте прокладки и шланги каждые несколько месяцев для обеспечения оптимальной производительности.
Могу ли я самостоятельно установить кухонный смеситель или лучше нанять специалиста?
Многие домовладельцы могут самостоятельно установить кухонный смеситель, если следуют правильным инструкциям и имеют нужные инструменты. Однако сложные модели, например, смесители с датчиками, могут потребовать профессиональной установки.
Как выбрать подходящий кухонный смеситель для своей раковины?
При выборе кухонного смесителя учитывайте размер раковины, высоту смесителя, длину излива и функциональность. Убедитесь, что смеситель соответствует дизайну вашей кухни и удовлетворяет требованиям повседневного использования.
Содержание
- Основные советы по установке вашего Кухонный кран
- Подготовка к установке кухонного смесителя
- Снятие старого кухонного смесителя
- Установка нового кухонного смесителя
- Проверка работы кухонного смесителя
- Уход за кухонным смесителем
- Установка кухонного смесителя для различных типов раковин
- Повышение функциональности кухни с помощью функций кухонного смесителя
- Советы по безопасности при установке кухонного смесителя
- Часто задаваемые вопросы